
How To Install Cedar Shingles – A Guideline and Benefits
 Thanks to their natural beauty, Cedar shingles are popular for roofing and siding. These shingles are also highly durable. And with such benefits, you should install them on your roof and siding. But how to install cedar shingles on the roof and siding?
We will discuss the benefits of adding cedar shingles on the roof and siding. Then, we will show you ways to install them on siding and roofs. You will also learn the tools required to install these beautiful and eye-pleasing shingles easily.
So, let’s get on with it.
Benefits of Cedar Shingles:
Top shingles are famous for their longevity. Also, they add an aesthetic appeal to your landscape and home. On top of it, you will enjoy their energy-efficient feature quite incredible. So, you will find these shingles incredibly useful.
Longevity:
Cedar shingles can last for decades with proper installation and maintenance. According to the Cedar Shake & Shingle Bureau, the average lifespan of a cedar shingle roof is 30 years. It can even last up to 50 years with proper care. It makes cedar shingles more cost-effective than other roofing materials in the long run.
Energy Efficiency:
Cedar shingles have natural insulating properties. It helps to reduce heating and cooling costs. The tiny air pockets within the wood trap air. So, it provides a layer of insulation to keep your home warm in the winter and cool in the summer.
According to the Western Red Cedar Lumber Association, homes with cedar shingle roofs can save up to 20% on energy bills compared to homes with asphalt shingle roofs. So, it is highly energy-efficient.
Aesthetic Appeal:
Cedar shingles have a natural, rustic beauty. Indeed, it adds charm and character to any home. The natural variations in color and grain give each shingle a unique look. Also, the shingles will weather to a beautiful silvery gray color over time. It is highly sought after by many homeowners.
Sustainability:
Cedar shingles are a sustainable and eco-friendly choice for roofing and siding. It is a renewable resource that is harvested from managed forests. Plus, the manufacturing process for cedar shingles requires less energy than other roofing materials. Additionally, cedar shingles can be recycled or repurposed at the end of their lifespan. It makes them a low-waste option for homeowners.
Installing cedar shingles on a roof can be challenging, but with the right tools and techniques, achieving a beautiful and long-lasting finish is possible. Here are some of the tools you will need to install cedar shingles on a roof:
Tools For Installing Cedar Shingles
When you decide to install cedar shingles, arrange your tools first. It is essential since you will require many tools; managing them can be tricky.
- Roofing hammer or pneumatic nailer
- Roofing nails
- Utility knife
- Chalk line
- Straightedge
- Roofing felt
- Underlayment nails
- Roofing adhesive
- Shingle gauge
How To Install Cedar Shingles On A Roof:
Installing cedar shingles on the roof gives your roof a perfect look. Also, it enhances the roof’s lifespan by preventing it from weather and elements. So, you must wonder how to install these fantastic shingles on your roof.
Step 1: Prepare the roof
Before you start installing cedar shingles, ensure your roof is clean. Also, it should be free of any debris. If there’s any debris, the shingles may not be as durable as they should be. Also, it causes rust and termite development later.
Next, install roofing felt on the entire surface of the roof. Plus, carefully fasten the roofing felt with the underlayment nails. It makes the shingles and roof weatherproof.
Step 2: Mark the shingle layout
Use a chalk line to mark the location of each row of shingles. You may start at the bottom of the roof and work your way up. Each shingle should overlap the previous one by at least 1.5 inches. If you don’t overlap the shingles, it will not look pleasing. Also, water can sneak through the gap.
Step 3: Install the starter course
You must install a starter course of shingles at the bottom of the roof. It is the first row of shingles installed along the roof’s eaves. The starter course should be made up of full shingles with the tabs cut off. Also, you must secure each shingle with roofing adhesive and nails.
You can begin by cutting the shingles to size. Plus, ensure to leave a 1/8-inch gap between each shingle. Use roofing nails to secure the shingles in place. While nailing the shingles, use the best nail gun for cedar shingles. We suggest using a pneumatic nail gun for the best results.
Step 4: Install the shingles
Install the first row of shingles starting at one end of the roof. Place the first shingle so that its bottom edge aligns with the bottom edge of the starter course. Also, you can use a chalk line to mark a straight line for the first row of shingles. Then, use the shingle gauge to ensure that the shingles are installed at the correct angle.
When you have measured the right angle for the shingle, it’s time to fasten them. So, nail each shingle in place with roofing nails. Finally, check that the nail heads are flush with the shingle surface.
Step 5: Continue installing the shingles
After installing your first row of shingles, continue installing the shingles in each row. You must maintain the correct exposure and overlap. For this, use a straightedge to keep each row straight and level.
You may have to cut shingles to fit around any obstructions, such as chimneys or vents. So, check for such spaces early and make the adjustments beforehand.
Step 6: Install the ridge cap
Once you have installed all the shingles, mount the ridge cap at the roof’s peak. The ridge cap is made up of special shingles. These are cut to fit the angle of the roof. You have to attach the ridge cap with roofing adhesive and nails.
Finally, inspect the roof to ensure everything is secure and properly aligned.
How To Install Cedar Shingles Sidings:
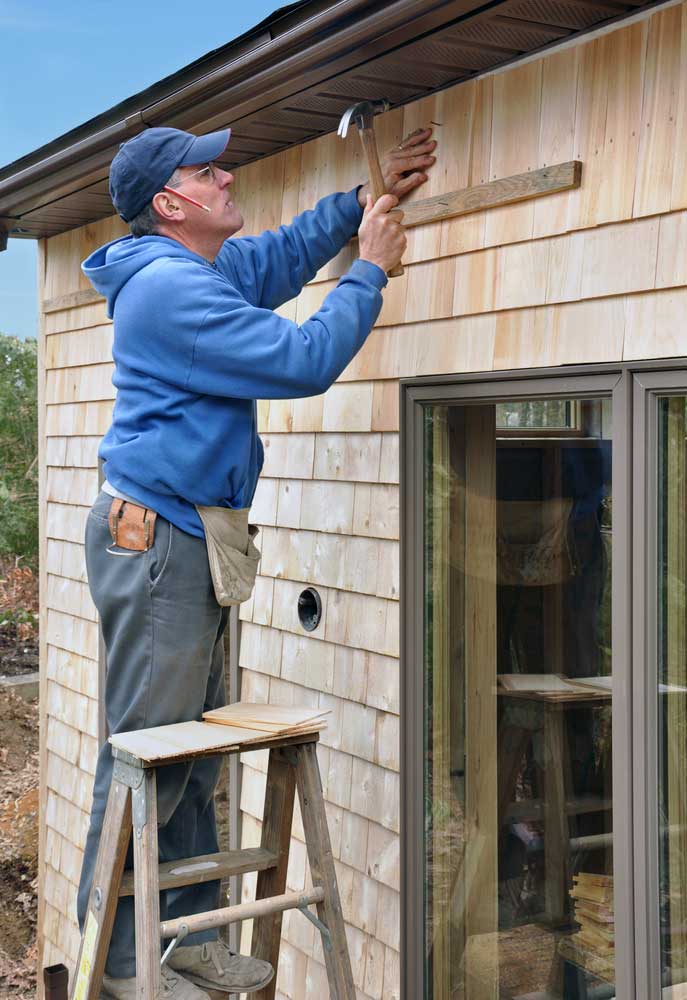 You may also add cedar shingles to the siding of your wall. It genuinely improves the aesthetics and lifespan of your regular wall.
- First, add a waterproof barrier underneath the shingles by applying building wrap. Also, apply flashing tape around windows, doors, and corners. You also must add trim on the doors and windows, as required.
- Next, lay out the course with the help of a story pole. It helps you mark the shingles point with pinpoint accuracy. Ensure that the layout is consistent. You can lower or raise the course right at the bottom for this.
- Now, install the first trim piece in the inside corner. It should remain invisible but broad enough to chalk the shingles after mounting them. You can use a 1X1 board for the trims. You can rip it off from a 5/4 cedar decking.
- As you start installing the first starter course, begin from the exterior corner. Ensure that the shingle has a 1-inch overlapping on the corner. Secure the shingle with a nail too. Follow this step to continue mounting the other starter course around the siding and its corners.
- When you have attached the first layer of shingles in the corner, trim them for perfection. And with this step, you can continue adding the layers of the successive shingle on the siding. Remember that the bottom layer needs to be 1 inch for the starter course. The top layer will be 1-1/2 inches in size for an overlaying effect.
- After installing the shingle around the corners, you may add them to the main wall. Also, follow the same process to connect and secure the shingles around the door and windows. As you mount the shingles, create an overlaying effect.
Following these steps, you may install the cedar shingles in the siding quickly. You may follow the YouTube video for more detailed information.
Conclusion
Installing cedar shingles enhances your landscape’s longevity, appearance, and eye-pleasing vibe. However, it needs maximum attention and a little woodworking knowledge. So, follow our guide to installing cedar shingles effectively and carefully.
Our guidelines will help you mount the shingles on the rooftop and siding. Always work with patience and the right nail gun. Plus, ensure it creates overlaying visibility for aesthetics.